Create, Read, Update(CRUD) operation in Soring Boot using RestAPI. As We know Spring boot and RestAPI is highly used and demanding these days. In this tutorial, we will see simple examples to perform CRUD operations in spring boot using REST API.
Some of the basic RestAPI methods that will use in these examples, GET, POST, PUT and DELETE and the meaning of these methods are too simple as the name suggests.
Following are the methods available in REST API CRUD.
- GET: To read a resource.
- POST: To add a resource.
- PUT: To update a resource.
- DELETE: To delete a resource.
For example, to get a resource present on the web, we will just use the HTTP method GET. To create a resource, we will call the POST method and so on.
Steps to perform CRUD operation in Spring boot using RestAPI
- Create a Spring Boot Starter Project.
- Create a package structure
- Create a database in MYSQL
- Configure application. properties file.
- Create an Entity
- Create a Repository i.e the Data Access Layer.
- Create Service Layer.
- Create Controller which will act as an API Layer that will have endpoints.
- Test using POSTMAN.
Here, we will follow the Spring Boot architecture as shown in the following diagram

CRUD operation in Spring boot using RestAPI
In the below example, let’s create a simple spring boot application and integrate RestAPI to perform CRUD operations in spring boot.
Create a Project
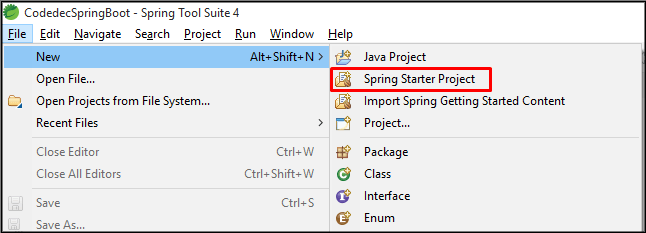
Step 1: Open IDE STS- Spring Tool Suite
Step 2: Go to File > Spring Starter Project.
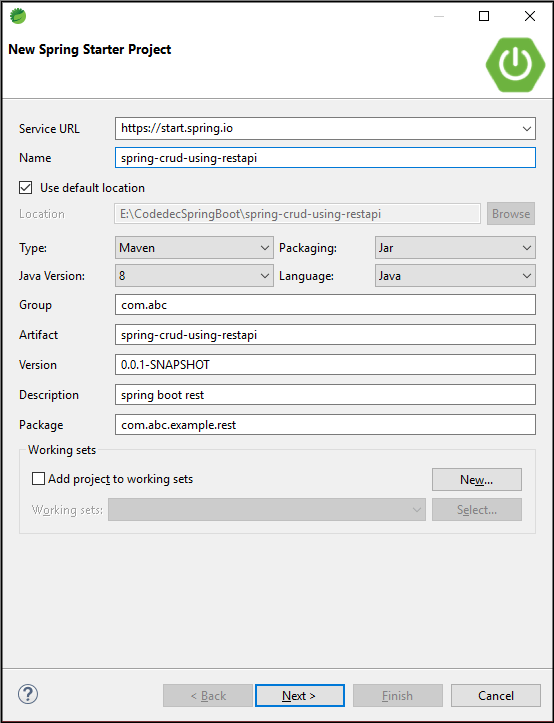
Step 3: Now, Fill all the fields as shown below and click Next.
Step 4: Now, Add the dependencies as per your requirement, I have added Spring Web Dependency and Spring Data JPA click Next > Finish.

Once the project is created, create the folder structure as shown below

Create Database
Create a database db_demo for storage purposes.
mysql> create database db_demo;
Configure application. properties file
This is the file provided by spring boot to configure JDBC URL, username, password, and driver class name. Also, configure JPA-related information.
# change the port
server.port=8888

#Database Configrations
spring.datasource.url=jdbc:mysql://localhost:3306/db_demo
spring.datasource.driver-class-name=com.mysql.cj.jdbc.Driver
spring.datasource.username=root
spring.datasource.password=root
spring.jpa.database-platform = org.hibernate.dialect.MySQL8Dialect
spring.jpa.generate-ddl=true
spring.jpa.hibernate.ddl-auto = update
- spring.jpa.hibernate.ddl-auto is set to update so that whatever changes we will do will be reflected in the schema.
- spring.datasource.url is used to set the URL of the MYSQL DB.
- spring.datasource.username is used to set the username and spring. datasource. password is used to set the password.
- spring.datasource.driver-class-name is used to set the driver class name.
- spring.jpa.show-sql is set to true to show SQL generated by the Hibernate.
- spring.jpa.properties.hibernate.dialect is used to generate better SQL for the chosen database.
- spring.jpa.properties.hibernate.format_sql is set to true to format SQL queries.
- server.port is set to 8888.
Create an Entity Class
Here, we will create an Entity that would be mapped to the database tables. It is nothing but the Java POJO class.
Product.java
package com.abc.example.rest.model;

import javax.persistence.Column;
import javax.persistence.Entity;
import javax.persistence.GeneratedValue;
import javax.persistence.GenerationType;
import javax.persistence.Id;
import javax.persistence.Table;
import lombok.Data;

@Data
@Entity
@Table(name = "product")
public class Product {

  @Id
  @GeneratedValue(strategy = GenerationType.AUTO)
  private long id;
  @Column(name = "product_name")
  private String productName;
  @Column(name = "product_price")
  private String productPrice;
  @Column(name = "product_desc")
  private String productDescription;

}
- @Data: This annotation is the combination of @Setter, @Getter, @EqualsAndHashCode, @RequiredArgsConstructor, and @ToString annotations.
- @Entity annotation mark this class as a JPA entity. It tells hibernate to make a table out of it.
- @Table specifies the name of the table where the entity will be mapped.
- @Column specifies the column for mapping.
- @Id annotation specifies the primary key of an entity and @GeneratedValue is applied to the primary key.
Create Repository Interface
The repository here is the DAO layer, which performs all the database operations. ProductRepository interface is created which will extends JPARepository<ClassName, ID>
ProductRepositoryInt.java
package com.abc.example.rest.repository;

import org.springframework.data.jpa.repository.JpaRepository;

import com.abc.example.rest.model.Product;

public interface ProductRepositoryInt extends JpaRepository<Product, Long> {

}
Create a Service Layer
This layer is responsible to handle business logic. Here, we will create the ProductService and its Implementation class ProductServiceImpl.
ProductService.java
package com.abc.example.rest.service;

import java.util.List;

import com.abc.example.rest.exception.RecordNotFoundException;
import com.abc.example.rest.model.Product;

public interface ProductService {

  public Product saveProduct(Product p);

  public List<Product> getAllProducts();

  public Product findProductById(long id) throws RecordNotFoundException;

  public Product updateProduct(Product p,long id) throws RecordNotFoundException;

  public void deleteProduct(long id);
}
ProductServiceImpl.java
package com.abc.example.rest.service;

import java.util.List;
import java.util.Optional;

import org.springframework.stereotype.Service;

import com.abc.example.rest.exception.RecordNotFoundException;
import com.abc.example.rest.model.Product;
import com.abc.example.rest.repository.ProductRepositoryInt;

@Service
public class ProductServiceImpl implements ProductService {

  private ProductRepositoryInt repo;


  public ProductServiceImpl(ProductRepositoryInt repo) {
    super();
    this.repo = repo;
  }

  @Override
  public Product saveProduct(Product p) {
    return repo.save(p);
  }

  @Override
  public List<Product> getAllProducts() {
    return repo.findAll();
  }

  @Override
  public Product findProductById(long id) throws RecordNotFoundException {
    Optional<Product> prod = repo.findById(id);
    if(prod.isPresent()) {
      return prod.get();
    }else
    {
      throw new RecordNotFoundException("Not found");
    }
  }

  @Override
  public Product updateProduct(Product p, long id) throws RecordNotFoundException {

    Product prod = repo.findById(id).get();
    if(prod.getId()!=0) {
      prod.setProductDescription(p.getProductDescription());
      prod.setProductName(p.getProductName());
      prod.setProductPrice(p.getProductPrice());
    }
    else
    {
      throw new RecordNotFoundException("Not found");
    }
    repo.save(prod);
    return prod;


  }

  @Override
  public void deleteProduct(long id) {
    repo.deleteById(id);
  }
}
Create a Controller
The client request is sent to the controller which acts as an API layer that will have the endpoints for REST API.
ProductCtl
package com.abc.example.rest.controller;

import java.util.List;

import org.springframework.http.HttpStatus;
import org.springframework.http.ResponseEntity;
import org.springframework.web.bind.annotation.DeleteMapping;
import org.springframework.web.bind.annotation.GetMapping;
import org.springframework.web.bind.annotation.PathVariable;
import org.springframework.web.bind.annotation.PostMapping;
import org.springframework.web.bind.annotation.PutMapping;
import org.springframework.web.bind.annotation.RequestBody;
import org.springframework.web.bind.annotation.RequestMapping;
import org.springframework.web.bind.annotation.RestController;

import com.abc.example.rest.exception.RecordNotFoundException;
import com.abc.example.rest.model.Product;
import com.abc.example.rest.service.ProductService;

@RestController
@RequestMapping("/restapi/products")
public class ProductCtl {

  private ProductService service;

  public ProductCtl(ProductService service) {
    super();
    this.service = service;
  }

  //1. Create REST API
  @PostMapping
  public ResponseEntity<Product> saveProduct(@RequestBody Product p){
    return new ResponseEntity<Product>(service.saveProduct(p),HttpStatus.CREATED);
  }
  //2. Get REST API
  @GetMapping
  public List<Product> getAllProducts(){
    return service.getAllProducts();
  }
  //3. Get REST API by Id
  @GetMapping("{id}")
  public ResponseEntity<Product> getProductById(@PathVariable("id") long productId) throws RecordNotFoundException{
    return new ResponseEntity<Product>(service.findProductById(productId),HttpStatus.OK);
  }

  //4. Update REST API
  @PutMapping("{id}")
  public ResponseEntity<Product> updateProduct(@RequestBody Product p,@PathVariable("id") long productId) throws RecordNotFoundException{
    return new ResponseEntity<Product>(service.updateProduct(p, productId), HttpStatus.OK);

  }
  //4 Delete REST API
  @DeleteMapping("{id}")
  public ResponseEntity<String> deleteProduct(@PathVariable("id") long productId){
    service.deleteProduct(productId);
    return new ResponseEntity<String>("Deleted",HttpStatus.OK);
  }
}
- Mark this class as @RestController(It is used to simplify the creation of REST APIs).
- The @GETMapping is used to map HTTP GET requests on specific handler methods.
- The @POSTMapping is used to map HTTP POST requests on specific handler methods.
- The @PUTMapping is used to map HTTP PUT requests on specific handler methods.
- The @DELETEMapping is used to map HTTP DELETE requests on specific handler methods.
- The @ResponseEntity represents an HTTP response.
- The @RequestBody is used to convert JSON to Java objects.
Create an Exception Class
If the resource is not found this exception will be thrown.
package com.abc.example.rest.exception;

import org.springframework.http.HttpStatus;
import org.springframework.web.bind.annotation.ResponseStatus;
@ResponseStatus(value = HttpStatus.NOT_FOUND)
public class RecordNotFoundException extends Exception {

  private static final long serialVersionUID = 1L;
  private String msg;

  public RecordNotFoundException(String msg) {
    super();
    this.msg = msg;
  }
}
Run the Application
Now, open the SpringCrudUsingRestapiApplication.java and click on Run as Spring Boot App.
Test the Application
Now, we will use the POSTMAN Application to test the APIs. Make sure you have POSTMAN installed on your machine.
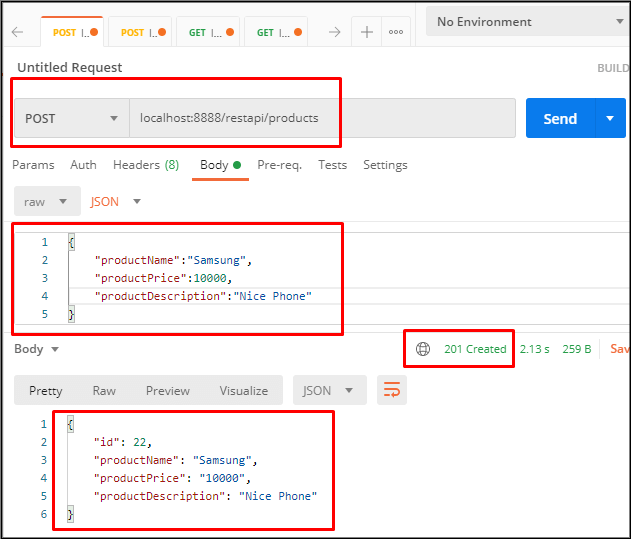
Test Post Request
Test Get Request

Test PUT Request

Test DELETE Request

Thus, this is how we perform CRUD operation in Spring Boot using REST API.
