How to Create a Custom Notification in Android. Let’s create an android example to genereate a custom notification with a custom message in Android.
Android SDK that we are going to use here is the set of development tools to develop applications for the android platform. With the help of this, we are going to create a notification with a custom message with a vector image.
Create a Custom Notification with Custom Message in Android
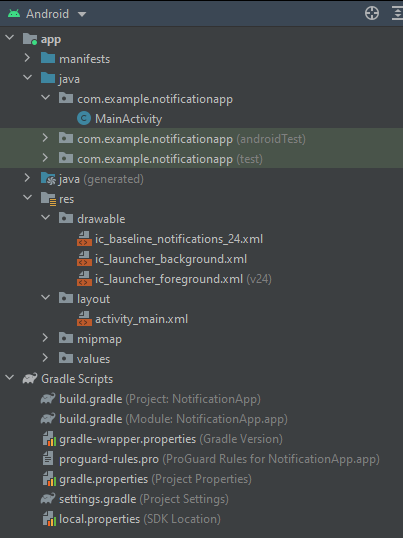
Anroid project structure:
Step 1: Create a project with Empty Activity.

MainActivity.java
- Button object will be used to connect with the button view.
- EditText object will be used to connect with the edit view.
- Button and EditText is a view in our main screen when the user interacts with a button or edit text we can perform certain actions with the help of an object.
- To connect the object to view we use the findViewById method and pass the id of view, we can assign every view a unique id and connect them to different objects.
- setOnClickListener method will execute when the user clicks on the button view.
- getText.toString method will return text written in the editText view.
- NotificationCompat class is used to build notification with, which is used to display app content in a floating window.
- Builder is used to build the notification.
- setSmallIcon method will display a small icon before the notification message.
- setContentTitle method will Set the title of the notification.
- setContentText method will set the custom message which we entered in the edit text view.
- setAutoCancel method will dismiss the notification when the user clicks on the notification.
- NotificationManager class is used to notify the user of events happing.
- .notify method will execute our custom notification 0 is id and builder.build is our notification.
package com.example.notificationapp;

import androidx.appcompat.app.AppCompatActivity;
import androidx.core.app.NotificationCompat;

import android.app.NotificationManager;
import android.content.Context;
import android.os.Bundle;
import android.view.View;
import android.widget.Button;
import android.widget.EditText;

public class MainActivity extends AppCompatActivity {
private Button button;
private EditText editText;
   @Override
   protected void onCreate(Bundle savedInstanceState) {
       super.onCreate(savedInstanceState);
       setContentView(R.layout.activity_main);
       button = findViewById(R.id.button);
       editText = findViewById(R.id.editTxt);
       button.setOnClickListener(new View.OnClickListener() {
           @Override
           public void onClick(View view) {
               String msg =editText.getText().toString();
               NotificationCompat.Builder builder = new NotificationCompat.Builder(MainActivity.this)
                       .setSmallIcon(R.drawable.ic_baseline_notifications_24)
                       .setContentTitle("New Notification")
                       .setContentText(msg)
                       .setAutoCancel(true);
               NotificationManager notificationManager = (NotificationManager) getSystemService(Context.NOTIFICATION_SERVICE);
               notificationManager.notify(0,builder.build());
           }
       });
   }
}
activity_main.xml
- RelativeLayout is our view Group to display child views at a certain position
- Layout_width tag is used to set the width of the view. match parent will change the size of view to the size of its parent here to the size of the screen
- Layout_height tag will set the height of the layout to the size of the screen
- Warp_content will set the size to size of data hold into view
- EditText is our text view in which we can enter text,
- Id tag is used to give the view a unique id which can be used to assign object to view.
- layout_centerInParent tag will align the view at the center of the screen
- marginBottom will give spacing below the view.
 <?xml version="1.0" encoding="utf-8"?>
<RelativeLayout xmlns:android="http://schemas.android.com/apk/res/android"
   xmlns:app="http://schemas.android.com/apk/res-auto"
   xmlns:tools="http://schemas.android.com/tools"
   android:layout_width="match_parent"
   android:layout_height="match_parent"
   tools:context=".MainActivity">

   <EditText
       android:hint="Custom Notification"
       android:id="@+id/editTxt"
       android:layout_width="wrap_content"
       android:layout_height="wrap_content"
       android:layout_centerInParent="true"
       android:layout_marginBottom="10dp"
       android:ems="10" />
   <Button
       android:text="Notify"
       android:layout_width="wrap_content"
       android:layout_height="wrap_content"
       android:ems="15"
       android:id="@+id/button"
       android:layout_below="@+id/editTxt"
       android:layout_centerHorizontal="true"
       />

</RelativeLayout>


Step 2: Create vector Icon
- Goto res directory -> drawable right-click on drawable new -> Vector Asset

- Click on clip art and save it as ic_baseline_notifications_24.xml
![]()
In this way, we learned how to create a notification with a custom message in Android.
Android practice tasks
https://codebun.com/login-and-registration-in-android-and-sqlite/
https://codebun.com/login-and-registration-in-android-using-firebase/
https://codebun.com/dynamic-and-static-dropdown-menuspinner-in-android/
https://codebun.com/crud-operation-using-sqlite-in-android/
https://codebun.com/crud-operation-in-android-using-firebase-database/
https://codebun.com/how-to-get-data-from-api-in-android/
https://codebun.com/how-to-create-custom-alert-dialog-in-android/
https://codebun.com/search-and-sort-records-in-android-with-recycler-view/
