How to get data from API in android? In this article, we will learn How to get/fetch data from API in android.
The Android SDK that we are going to use here is the set of development tools to develop applications for the android platform. Here, in this Application, we are going to Read API data and insert it to RecyclerView, and Display that RecyclerView on MainActivity.
Following will be the project structure:

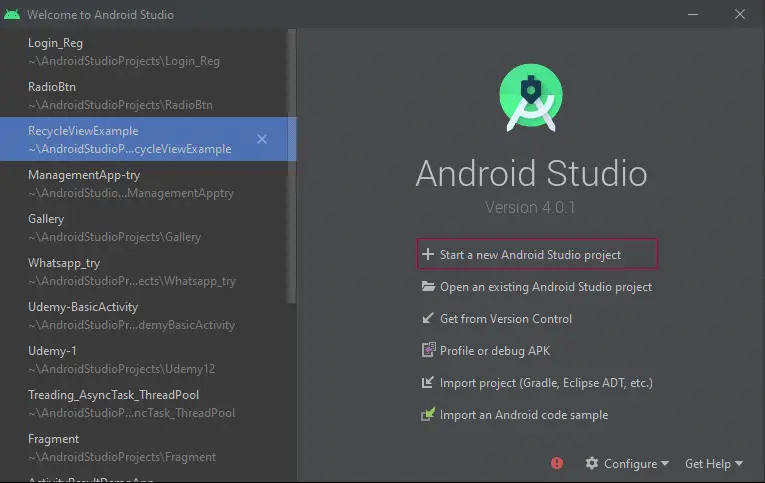
Step1: Getting Started With Android Studio
- Create a project with Empty Activity

Step 1.1: Adding dependencies
- Goto Gradle Scripts Click build.gradle(Module: app)

- In dependencies add
implementation 'androidx.recyclerview:recyclerview:1.2.1'
- In this activity, we will Create the Main Page of our Application
- This page consist of a Recycler View
- arrayList is an Object of ArrayList Class of type DBHelper which is our wrapper Class
- RecyclerView is a designing tool used to display a large set of data
- We are using the getData() method we are using it to Receive JsonArray
- We are also Using Volley Library it helps in networking
- RequestQueue is used to add an HTTP request to the queue
- JsonArrayRequest object is used to make new JsonArryaRequest
- This object is passed with value Request.Method.GET will return JsonArrya Then we Pass the JSON Array URL
- Listener<JSONArray>() will get the Response from JsonArray
- onResponse method will give us the JsonArray and we are going to loop through it and Add JSONObject to an ArrayList
- parseInt method is used to convert the value to Integer
- getString method will return us the value from JSON object with tag UserId
- setAdapter method is used to pass a list to RecyclerView
- new Response.ErrorListner is used to listen to any Error occurred
- d will display the msg Went Wrong with tag my-api in Logcat.
- requestQueue.add(jsonArrayResquest) is used to add jsonArrayRequest to queue.
MainActivity.class
package com.example.my_api;

import androidx.appcompat.app.AppCompatActivity;
import androidx.recyclerview.widget.LinearLayoutManager;
import androidx.recyclerview.widget.RecyclerView;

import android.os.Bundle;
import android.util.Log;

import com.android.volley.Request;
import com.android.volley.RequestQueue;
import com.android.volley.Response;
import com.android.volley.VolleyError;
import com.android.volley.toolbox.JsonArrayRequest;
import com.android.volley.toolbox.JsonObjectRequest;
import com.android.volley.toolbox.Volley;

import org.json.JSONArray;
import org.json.JSONException;
import org.json.JSONObject;

import java.util.ArrayList;

public class MainActivity extends AppCompatActivity {
    private ArrayList<DBHelper> arrayList = new ArrayList<>();
    private RecyclerView recyclerView;
    @Override
    protected void onCreate(Bundle savedInstanceState) {
        super.onCreate(savedInstanceState);
        setContentView(R.layout.activity_main);
        getData();
        recyclerView = findViewById(R.id.list);
        recyclerView.setLayoutManager(new LinearLayoutManager(this));
        recyclerView.setAdapter(new Users(arrayList));
    }
    public void getData(){
        RequestQueue requestQueue;
        requestQueue = Volley.newRequestQueue(this);
        JsonArrayRequest jsonArrayRequest = new JsonArrayRequest(Request.Method.GET,"https://jsonplaceholder.typicode.com/todos",null,new Response.Listener<JSONArray>(){
            @Override
            public void onResponse(JSONArray response) {
                try {
                    for (int i=0;i<response.length();i++){
                        JSONObject jsonObject = response.getJSONObject(i);
                        Log.d("my-api","==== "+jsonObject.getString("title"));
                        Log.d("my-api","==== "+jsonObject.getString("userId"));
                        Log.d("my-api","==== "+jsonObject.getString("id"));
                        arrayList.add(new DBHelper(Integer.parseInt(jsonObject.getString("userId")),Integer.parseInt(jsonObject.getString("id")),jsonObject.getString("title")));
                    }
                }catch (Exception e){
                    e.printStackTrace();
                }
                recyclerView.setAdapter(new Users(arrayList));
            }

        },new Response.ErrorListener(){
            @Override
            public void onErrorResponse(VolleyError error) {
                Log.d("my-api","went Wrong");
            }
        });
        requestQueue.add(jsonArrayRequest);
    }
}
activity_main.xml
- activity_main.xml consists of LinearLayout.
- orientation is used to set the orientation of the layout
- layout_widht is used the set width of the view example match_parent value is passed then the view will take the size of its parent view or if the view is parent view then it will take the size of the screen Same with the height.
- warp_content the view will take the size of content passed to the view
- id tag is used to access button view from button object in our main class and we can change button view attributes through the object.
- androidx.recyclerview.widget.RecyclerView is RecyclerView and we provide it with id.
<?xml version="1.0" encoding="utf-8"?>
<LinearLayout xmlns:android="http://schemas.android.com/apk/res/android"
    xmlns:app="http://schemas.android.com/apk/res-auto"
    xmlns:tools="http://schemas.android.com/tools"
    android:layout_width="match_parent"
    android:layout_height="match_parent"
    tools:context=".MainActivity"
    android:orientation="vertical"
    >

    <TextView
        android:layout_width="match_parent"
        android:layout_height="wrap_content"
        android:text="User Data"
        android:textAlignment="center"
        android:textSize="20dp"
        android:layout_marginBottom="10dp"
         />
    <androidx.recyclerview.widget.RecyclerView

        android:layout_width="match_parent"
        android:layout_height="match_parent"
        android:id="@+id/list"
        tools:ignore="InvalidId"
        />

</LinearLayout>

Step 2: Creating Adapter and DBHelper Class
Create Two new Class Users and DBHelper.

ListAdapter.java
- This Adapter class will be used to populate the Recycler view with user data as Card.
- Extend adapter class with RecyclerView.Adapter<OuterClass.InnerClass>.
- Extend inner class with RecyclerView.ViewHolder class.
- Now in the inner class, we use the constructor to assign objects to view
- Override abstract method in ListAdapter class
- onCreateViewHolder method is used to populate Recycler View which we Created in activity_main.xml with list_item.xml.
- LayoutInflater is used to inflate Recycler view with Card View.
- We pass an array to Recycler view and it gets populated with a card view for every entry of the array
- onBindViewHolder method is used to make changes to card view child nodes.
- getItemCount() method will return the size of array.
package com.example.my_api;

import android.view.LayoutInflater;
import android.view.View;
import android.view.ViewGroup;
import android.widget.TextView;
import androidx.annotation.NonNull;
import androidx.recyclerview.widget.RecyclerView;

import java.util.ArrayList;

public class Users extends RecyclerView.Adapter<Users.UserView> {
    private ArrayList<DBHelper> arrayList;
    public Users(ArrayList<DBHelper> arrayList) {
    this.arrayList = arrayList;
    }

    @NonNull
    @Override
    public UserView onCreateViewHolder(@NonNull ViewGroup parent, int viewType) {
        LayoutInflater inflater = LayoutInflater.from(parent.getContext());
        View view= inflater.inflate(R.layout.users_list,parent,false);
        return new UserView(view);
    }

    @Override
    public void onBindViewHolder(@NonNull UserView holder, int position) {
    String user =String.valueOf(arrayList.get(position).getUser());
    String id =String.valueOf(arrayList.get(position).getId());
    String title =arrayList.get(position).getTitle();
    holder.textUser.setText(user);
    holder.textTitle.setText(title);
    holder.textId.setText(id);

    }

    @Override
    public int getItemCount() {
        return arrayList.size();
    }

    public class UserView extends RecyclerView.ViewHolder{
        TextView textUser;
        TextView textId;
        TextView textTitle;

        public UserView(@NonNull View itemView) {

            super(itemView);
            textUser = (TextView) itemView.findViewById(R.id.textUser);
            textId = (TextView) itemView.findViewById(R.id.textId);
            textTitle = (TextView) itemView.findViewById(R.id.textTitle);
        }
    }
}
DBHelper.class
Here we are using wrapper class to insert data into firebase with the help of the DBHelper constructor. The DBHelper get method is used to return the String value.
package com.example.crud_firebase.DBHelper;

public class DBHelper {
    private String userName;
    private String email;
    private String number;

    public DBHelper(String userName, String email, String number) {
        this.userName = userName;
        this.email = email;
        this.number = number;
    }

    public String getUserName() {
        return userName;
    }

    public String getEmail() {
        return email;
    }

    public String getNumber() {
        return number;
    }
}
In this way, we fetch or get the data from the API in Android.
Android practice tasks
https://codebun.com/login-and-registration-in-android-and-sqlite/
https://codebun.com/login-and-registration-in-android-using-firebase/
https://codebun.com/dynamic-and-static-dropdown-menuspinner-in-android/
https://codebun.com/crud-operation-using-sqlite-in-android/
https://codebun.com/crud-operation-in-android-using-firebase-database/
https://codebun.com/how-to-create-custom-alert-dialog-in-android/
https://codebun.com/search-and-sort-records-in-android-with-recycler-view/
https://codebun.com/create-a-custom-notification-with-custom-message-in-android/
